Sunday, September 5, 2010

Assignment 3 - Birthday Card


Hi,

So i'm back for the third assignment of this subject. What i have to do is to recreate a birthday card ( given by lecturer ) with local content. So what can i think is hibiscus. I was thinking about making a simple birthday card because me personally didn't like such an abstract pictures. But since this is for the assignment, i'll try to not make it too simple. So here's what i've did.

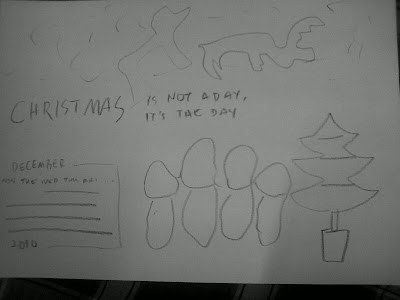
Bottom pictures shown is the card template given by lecturer. I wanna change the guitar to hibiscus. And letter in the box (second picture) to the color of national flag.


________________________________________________________________

Now, i create a canvas using A3 size (420mm x 297mm). Now what i'm doing is to divide the canvas to half the size of the canvas. So i make the Ruler appear (cntrl + R). Then using Rectangle Tool (M), i create a rectangle shape and color it do light blue. Then i apply the Gradient. Change the type to Linear Gradient, and the angle to 180°. I apply the light blue + white. The using the rectangle tool again, i make 20 small box, to put letter in there. THen i changed the color to red, yellow, white and blue.

________________________________________________________________

Next, i put the letter in the small boxes i've created just now. Using the Type Tool (L), and using the font Papyrus of 72pt size, i make the letter of H A P P Y to fit it in the box.

________________________________________________________________

Next, as in the example given by lecturer in 1st picture, i want to apply the line. So i draw a line using the Pen Tool (P). Next, i apply the gradient, and changed the color to : 1st line, red and yellow and 2nd line, blue and white.

________________________________________________________________

Next step is, like i said earlier, i wanna use the hibiscus as my local content in the card. So i Google and found a picture of nice hibiscus. So i just do a simple trace. Then expand.

________________________________________________________________

Then, i bring the traced hibiscus to the canvas. I copy and make 2 more hibiscus there. I change the size to make it more attractive. I also reflect one of the hibiscus facing the other side. Click at one of it, then right click > Transform > Reflect 90°.

________________________________________________________________

Last step for the front cover of the card is to put the wishes. So using the Type Tool again, i wrote Sweet Birthday. (i'm using Edwardian Script ITC sized 72pt)

________________________________________________________________

Now, i'm making the internal design of the card. Using rectangle tool, i make a shape by following the original canvas. And copy the half-sized gradient blue box and pasted it on the rectangle shape i created earlier.

________________________________________________________________

Then i wanna make the border of the internal design. So i google again and found a picture of 3 hibiscus. :p So i traced again, using the Live Trace. But this time i'm using One Color Logo type because i wanna make it look more connected to each other.

________________________________________________________________

Next is copy, paste to the original canvas i'm working on. So since the border on have 3 flowers, i pasted it to the canvas for 5 times, so i can fit it both page of the internal side.

________________________________________________________________

Last step is, i'm using the wishes given in Madam's blog (Wishing a very special person, a special birthday). I'm using the font Edwardian Script ITC again but 170pt size for the 'Wishing', and 72pt size for the other words.

________________________________________________________________

So here it is, my local-content birthday card. Third assignment is done, now working for the final.

________________________________________________________________

Madam, i'm really sorry for the late update. It's really my fault, and i'm really regret it. I hope i didn't get too many mark deduction. Thanks Madam. :D


Sunday, August 8, 2010

Assignment Calendar


Hello everyone, so i'm back with the second assignment. I have to make a calendar of a celebrated month. As for example, Deepavali, Eid Al-fitr and Christmas. So, i've decided to make Christmas in December. The first picture shown on lecturer's calendar on Eid Al-Fitr. I've benn using this for my reference.


And next is my sketch on how am i gonna do my calendar.

________________________________

So the first step is the background. I got this picture from Google for the Santa and the deer. So what i do is live trace > expand. Then, i press cntrl+a (to select all) and right click > ungroup. This is because i don't want the black background.


Next, i paste the Santa and the deer, and expand the size. Using the move tool of course. Then, i use rectangle tool, make a rectangle then color it blue. Then i use gradient tool (control +F9), to make the gradient. I chose blue and white to symbolize the dark sky and the snow.

Then using the paintbrush tool (B), i create a star shape to put it on the sky. The i just put a lot of dot at the background to look better as sky with the stars.

____________________________

Then, i wanna put a tree with snow on the right side. So i got a picture on the internet and live trace > expand > ungroup. Then i drag the tree only, to the canvas and paint it with Live Pain Bucket tool (K). In order to paint, you first have to select which one you wanna fill the color with. So i chose green, yellow, and red.


To make the snow, i simply duplicate the tree I've made. Then i make it a little big from the original tree. I take out all the color and border color. Then i drag to the original tree, and to put it behind the original tree, right click > arrange > send to back.


So now it look more like snow on the Christmas tree.

_____________________________

Next, i make the date and the year. Using the Text tool (T), I've write the date, year, day and month using font Carrieban Regular I've download.

As my reference calendar, there's a line, so i make a line but i use crosses pattern for the border to make it more colorful.

____________________________

Then, i wanna put people singing beside the tree. So i find in internet, and found a picture. So again, live trace > expand > ungroup.


Then, i drag the people and the music note to the canvas. Using the Live Paint Bucket again, i color them and draw the face of the people using Paintbrush tool.

________________________

The last step is to put a greet on the calendar. Using text tool again, and same font as the month, i've right click > create outline on the text. This is because i wanna put different gradient on every single word. Next, i've put yellow border.

To make it more 'alive', i copy the word, and take out all color and border. Again, put it behind the original. Arrange > send to back.

__________________________________

So it's done. :)
I hope madam like it, because i like it. <3


Sunday, July 11, 2010

Assignment 1 - Logo Re-design


Quiksilver designs, produces and distributes clothing, accessories and related products for young-minded people and develops brands that represent a casual lifestyle driven from a boardriding heritage. Quiksilver's authenticity is evident in its innovative products, events and retail environments across the globe. Quiksilver's products are sold throughout the world, primarily in surf shops, skate shops and other specialty stores that provide authentic retail experience for our customers.

Here's is the link for the original logo company's website :


Here's the link for the explanation of the new logo :

Redesign an international logo, which is i picked, Quicksilver. The first picture shown how i sketched the logo, and i put some local context which is gasing (top) and the tiger head (harimau malaya). So what i want to do with my logo is take out the thing in the middle of logo, and replace it with a top, and add a tiger's head on left side of the logo. (which is i traced from Proton's logo and do reflect )

The symbolic for the tiger's head on the left it the strength of the wearer as tiger is the symbol of bravery and strength of Malaysian. And it painted yellow because it represent how the wearer should be respect by the other brand. The red big line under the logo represent or symbolize to warn the wearer and everyone the danger of water sports. The blue color represent the wave since this company 80% produce clothings for wave surfer. The top represent the art and uniqueness of the wearer. And it painted gray asp symbolic of the speed of the clothes wearer.

Here's are the step by step.


First, i traced the original logo of Quicksilver. I was using the Pen tool to trace the outline or border of the logo. Then, using the same tool, i traced the border of the top from the sketched I've draw.

-------


Then, to make the top look alive and nicer, I've draw some shadow (using line segment tool). Then using the pen tool again, i draw a shining thing at the top. I colored it white, and changed the opacity to 20.

-------


Next step is, i deleted the middle thing in the original Quicksilver logo, and replaced it with the top I've draw.

-------


Next, i traced the original Proton logo, to take the tiger's head in the middle to put it in my logo. Using the pen tool again, i traced and deleted the rest of the logo. Since it's facing the other side, I have to change it to the other side. So i select the head's layer, and make the head reflect using, (right click) Transform > Reflect 90 vertical.

-------


To make the logo look better, I've resize the top size to fit the logo. Then, i drag the head to the left side of the logo, resized, and placed it.

-------


And last, I've put the color to meet the local context. So i put it as our national flag color. I've change the color of the top to gray.

DONE!!


Monday, June 21, 2010

Tutorial - O n e

Introduction to....

Update later..

Blog Owner Introduction


Hola! So you're about to know the profile of the blog owner which is me. I'll start from a picture of myself. Which is an old picture but i still will put it here so that you'll know. :p


It's me on the right with the cap!


Okay let's start. My full name is Mohd Noor Adzfar Bin Md Kamsani. (Call me ASPA) I am 24 years old because i was born in 1986, November 5th. When i was a kid, i grew up in a lot of place. Bera,Pahang then Bentong, Pahang from 13 years old to 20 years old. Then my family moved to Gombak, Selangor because my father's work. And the last 2 years, we've moved to Kajang, Selangor because of my mother's work.

I'm studying at MMU in Bachelor Of Media Innovation And Management. It's my first year. And i really hope i can do my best in all subject. :p I am very interested in gaming, photography and futsal. Yes, i can create creativeness in all of my interest. As for example, gaming. I need to think the strategy to beat my enemy. So i have to think something creative (startegy) which will make them confuse and lose. And so photography, i need to be creative so my picture will be great. Last, futsal. Of course, i have to do a lot of creative trick to beat my opponent to score and win them. :D

I hope i can do my best in the subject.And i've been involved in event such as sekolah@mmu and gaming tournament.

So that's a little about me. Okay now. See you next post.